
Finished Luminary
Unfortunately, One of the sides broke due to extremely thin pieces of wood, but the luminary still looks ascetically pleasing overall


Finished Desktop Organizer


Sunday, 6:30 – 9:00
I cut out my parts, but later realized that the elephant ear on one of my parts was blocking my joinery, so I have to recut one of the parts during next class or reading day. I also prepped the sheet for my luminary for the assembly of all the sides
Homework Due Thursday, May 25
For homework I completed the rhino design of the sides and top of the elephant luminary. The top is the image of a dragon, which represents the dragons me and my grandma used to paint when I was younger, while the elephant represents my version of a bronze statue she got for me as a gift.

Classwork Wednesday, May 24, 2023
In class I glued part of my desktop organizer together as well as continuing on the design of my elephant luminary
Homework Due Wednesday, May 24, 2023
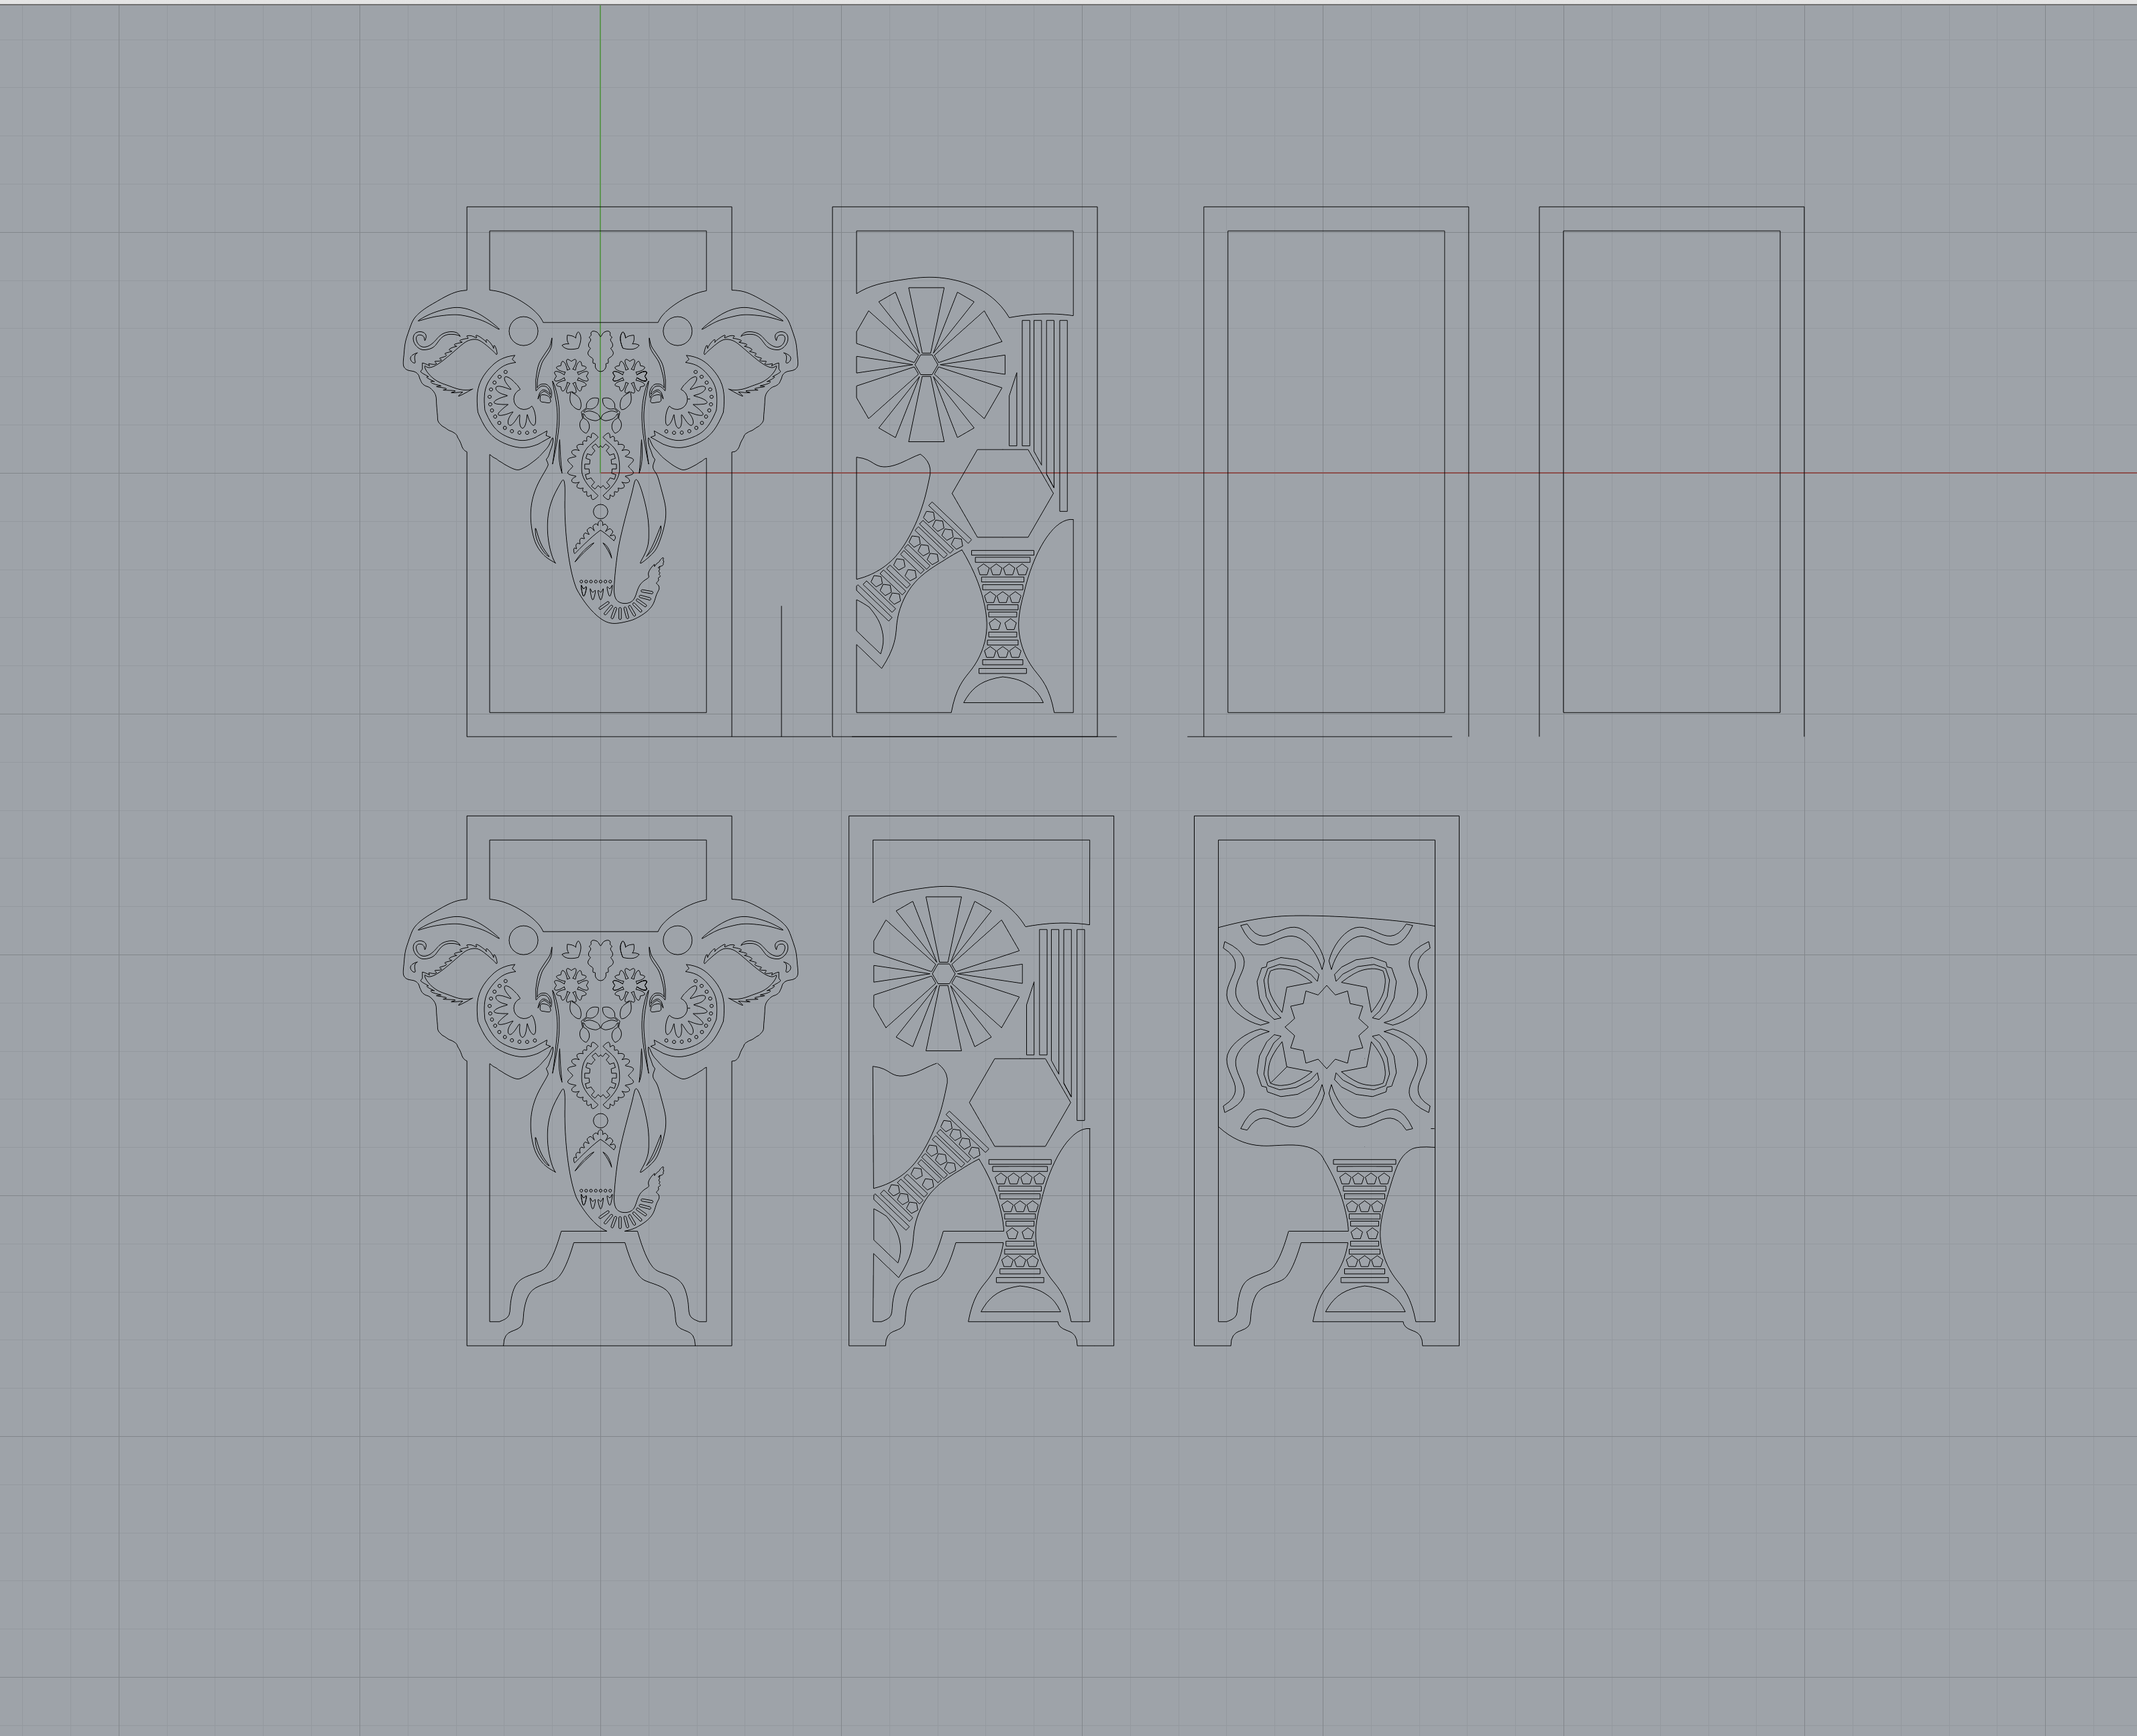
I made a copy of the current sketches and experimented with different types of feet and elephant designs. After hours of experimentation, I realized that the current structure of the elephant I have is actually really realistic, and with a few tweaks, I was able to have the current elephant leg go through my new feet design. On Rhino it seems to look fine so I will ask of your opinion in class and see if there are any improvements to be made. I also “finished” the third panel of the luminary design. I might want to add some more details at the end, however it holds the solid shape of the elephant and flows cohesively from the second panel. The last panel will be a head on view of the rear of the elephant with a cut out tail, though this design option is not finalized and I may decide to go with a side view of the elephant’s rear.
Classwork Monday, May 22, 2023
In class I realized that I still had some last minute parts to stain for my desktop organizer. After finishing the stain, I talked with you a little bit about the issue of including the feet that were originally in my plan. I also edited the first two sketches to “finalize them, though I have a feeling the second one will change.
Homework Due Wednesday, May 17, 2023
Over the weekend I was able to make a little progress on the elephant ears, only having the stand part left to go. However, when trying to do more work today my fusion kept crashing so I could not get much done. I tried downloading Rhino, but it want a login number that I don’t have so I will need your help with that tomorrow. Either Wednesday or Thursday could you show me some of the basics and tools of Rhino, especially since I a crew practice after my first 2 classes on Thursday and will not be on campus on Friday due to a regatta.
Classwork on Monday, May 15, 2023
During class, I realized there were a couple parts I had not stained yet, which I will finish next class and be able to assemble on Thursday. From a Fusion perspective, I was not able to get much done without my Fusion crashing, so I will try and download Rhino to finish my design on that platform.
Classwork Thursday, May 11, 2023
In class I heavily worked on staining all of my parts and finishing the desktop organizer. To my knowledge I stained all of my parts this class and plan to construct everything on monday.
Homework Due Thursday, May 11, 2023
For homework I added in some more of the details in the elephant. I found this really difficult since the line of symmetry was no longer in the center of the trunk, making it really hard to make something symmetrical while also fitting into the trunk. I decided to move my mirror line towards the center of the trunk and not of the whole piece, but had to adjust things along the way to look asthetically pleasing.
This is the image of my progress so far. After finishing my desktop organizer I plan to add the details to my ears and make a slight adjustment to the crown shaped piece above the circles in the trunk. Right now it is pointing on its own line of symmetry and looks a little off compared to the rest of the shapes. I plan to make the part on the right side shorter and have an arc the starts slightly higher, and the left side have a longer arc that goes to the other side of the trunk.

Homework Due Monday, May 8, 2023
For homework I began designing the model of my elephant luminary in fusion. With many complex details, it took me a really long time to form only a few symmetrical and aesthetically pleasing flower designs. I also traced the cut out of the elephant, which I could not mirror over perfectly since the sides are slightly different. This forced me to experiment by adjusting the points of the spline tool until it looked relatively symmetrical but maintaining the elephant shape. I added the square frame of the luminary side and some details with the eyes as well.
It was hard to see the details inside the elephant so I highlighted the wood parts in blue

Classwork Due May 4, 2023
In class I started to stain my parts, trying to finish the desktop organizer so I can focus more on my luminary design, which will probably take a lot longer than I expect. I also sketched out part of the rough outline of the elephant shape, but did not add in any details.
Homework Due May 4, 2023
For homework I decided I would elaborate more on my elephant design. I was only able to finish two pictures in the span of an hour and a half, yet they both are very detailed and have precise measurements to fit the size of my actual luminary. I decided to go with a luminary with feet, but I wanted to make them interesting with a curvy outline and some cut outs.
This first image displays a larger elephant with a smaller one on top. The shaded areas are cut out, and the ears currently extend off the side of the luminary. Are we allowed to do this?

This sketch is of the side of the elephant. It will be on the right side from the first image, and will have a second side as a continuation of the body and a last panel showing the rear end of the elephant with the tail.

Classwork May 1, 2023
In class, I found the two stains that I wanted to make the outside light and the inside dark, per request of my person. While there was not enough room to finish all of my pieces, I was able to stain one side of half of them. Next class I will try and finish this half and stain the first side of the other half.
Homework Due May 1, 2023
For homework, I created 4 different sketch designs, two being symmetrical and the others being asymmetrical. The concept I think I am going to explore in greater detail is the shape of the elephant, incorporating both of the design types of my asymmetrical pieces to form the elephant shape. while using cut outs to let the light shine through. Images of my sketches are displayed below.
Asymmetrical

Asymmetrical (This piece was measure out to the actual size)

Symmetrical

Symmetrical

Classwork April 27, 2023
In Class, I worked on cutting out my parts for the desktop Organizer. I encountered a slight problem by forgetting to switch print designs on the laser cutter, but managed to rectify the problem by cutting it out by hand. I sanded down all of the pieces and they seem to fit perfectly together. All I have left is to stain the parts and glue them all together. All my parts are displayed below.

Homework Thursday April 13, 2023 (Finished 3D Model)
For Homework I finished the 3D model of the stand for my desktop organizer. I tried to incorporate the design of a castle, having a slight resemblance to a rook, while also being functional with a platform for shoes, edges to keep the organizer in place, and a compartment for extra miscellaneous items.


Classwork Monday April 10, 2023
In class I polished my final Desktop organizer, removing some floating pieces like the center of the O’s and the A, as well as a part by the E. I also gathered a general idea of what my stand would look like with a .5 in material thickness.
Homework Monday April 10, 2023
Since we last had class, I made a lot of progress on my desktop organizer. I added a “Make Your Move” text on the back with the cut out of a queen. At first I made the text facing from the back of the organizer, but ultimately decided it would be viewed mostly from the front and reversed the cut out. I also added the divider to finish the holder for Grant’s Binder and wall off the section for books. I also added in the drawers that are easily accessible, the larger one with the text “Checkmate”, and the smaller one with a triangularly profiled design. So far, I finished my goals for the organizer part of the design, adding in the hole for his cords and all of the last finishing details.

Front View

Back View
Homework Thursday April 6, 2023
After a couple of hours, I formulated my organizer with the shelf, base, sides, and back all with correct joinery and side being cut out to show the profile of my chess pieces. In the back I decided I will write “make your move” instead of the chess board primarily because of the joinery messing up the lines of the chess board. Here is an image below:
As you can see the pieces are now 2 layers of wood thick with the back now including the side plate for stability and connections

Classwork Wednesday April 5, 2023
Today we presented our desktop organizers to the class. I did not receive many things to improve upon, however, when talking to you I realized I needed yet another change of design. Since all my joinery would have been messed up, I decided to start over for the final time. Here are images of the organizer on in context: Note he had to move all of his stuff to the floor to make room for the organizer since there is barely any room on his desk.
On his desk

Where I would have it with a stand

Homework Wednesday April 5, 2023 (Feedback Paragraph)
Today I asked Grant what he thought of my continually progressing new design. Comparing the new design to the old one, he will now have 2 separate drawers with the ability to store his binder on top of a redesign of the shelf. The shelf will have a wide half that will stick out to support the binder and be better suited to fulfill his needs. The box will also be taller with a redesign of the aesthetics to include the family of pieces including the king, queen, and rooks. Overall, he really liked the way I am approaching the design on the decorative sides as well as the drawers for added storage. On the final completed version, he mentioned he would like the pieces on the sides stained darker and the board supporting it as the wood’s natural color or an extremely light stain to give contrast.
Homework Wednesday April 5, 2023
For homework I started over on my design for the side of the organizer. My idea was to have the king and queen on either side with a rook in the middle, which turned out to be a larger one stacked on top of a smaller one. While each of these components are separate sketches, for printing the parts out I will project them all onto one sketch to add more stability. Instead of having rounded ends on the bottoms, I squared them off for easy attachment to the base and back. Grant really liked my design choice when I showed it to him, however, he noted that the 6in platform should be longer since he also has a 2.5in wide binder to store, which is roughly 11in long. My new idea is to have a 2.5in wide drawer that extends all the way down the organizer. I will cut out little grooves in the long drawer so that he can store his pencils without them rolling around everywhere. The main drawer will be reduced in size to accommodate this extra drawer. Since the smaller drawer will be extending outwards, Grant will be able to put his large binder on top while also storing a couple of books. Here is an image of my progress below:

I will add a square piece of wood behind in order to cover gaps and have an easier time with connecting the shelving
Classwork Monday April 3, 2023
Today in Class I had a conversation with you and realized the sideways rook might not have been the best design choice. In class I started to work on the cut out of the king and queen, but when doing my homework, I realized I did not like some of the proportions and started over. An image of my progress is shown below.

Homework April 3, 2023
For Homework I started on my new desktop organizer in fusion, however, I took a different approach from my original design. Instead of starting with the sides, I started with the base. In my prototype, I realized I tailored the structure to the side pieces, which created some issues in the stability department. Here, I added a piece in the shape of an L onto the bottom of the rook, providing more support and a larger area for gluing. In the new design of the rook I changed minor details that I thought made the rook more visually appealing while also adding a slot for a pencil in the base. The images are displayed below:
Overall Progress

L-Piece for more stability

Classwork Thursday March 30, 2023
In class I added some finishing details and printed out the cardboard prototype on the laser cutter. I realized my variable was not working properly so I am going to remake the design with minor improvements for the final. I showed Grant the model of my design and he really liked the aesthetic looks of the organizer so no major changes necessary. My organizer in cardboard is shown below.

Homework Thursday March 30, 2023
For homework I spent over an hour adding the base for the organizer and the shelf installation. However, the main thing I worked on was figuring out the joinery of all of my pieces, which turned out to be much more complex than I initially anticipated. I was initially thinking of having a large bishop cut out running down the center of the rook, however, looking at the placement of the shelf, a smaller bishop cut out towards the from of the rook is the only option acting almost like a window. I not only think the smaller bishop cut out looks better in the design but also allows for the hidden compartment in the back. Images shown below.
Image of the whole organizer progress

Image of Joinery

Classwork Wednesday March 29, 2023
Today I began designing my desktop organizer, creating the side panel in the shape of a rook and the sketch for my chess board. However, on the cardboard prototype I cannot include an etching and will just stick with a plain backboard with cut out holes for where the cords will go. My progress is shown below.

Homework Tuesday March 29, 2023
For homework I completed the rest of my sketches and asked Grant which one he prefers while also balancing the difficulty of the design. While my initial idea was the knight shaped side, I realized I was being overoptimistic in stability and the amount of time it would take to create. Thus, I decided to make the side profile in the shape of a rook, which actually looked better as an overall design. However, I did like the aesthetically pleasing look of the chess board on the backboard and the chess king cutouts as holes for the cords, which I thought were cohesive throughout all of the designs without being incredibly busy.


Classwork Monday March 27, 2023 (Problem Statement)
When talking to Grant, he mentioned his power bank, which constantly falls off of his desk into a tangle of jumbled cords while also taking up a ton of room on his desk. My main goal for the desktop organizer is to provide a stable and effective storage of his power bank while also decluttering his desk, which is currently filled with old books and pencils. However, I want the desktop organizer to seamlessly match the chess theme of his room. Immediately, you can see the giant chess posters, chess bed spread, and black and gold chess pieces on top of his dresser. For the aesthetics, I am going to try and make the sides of the desktop organizer in the shape of a rook with a bishop cut out as a window. I was thinking of making the back of the organizer have an 8in by 8in checker board on the back with 3in margins on either side as holes for the cords of the power bank. Inside of the organizer, I would add a shelf for books with the drawer for the power bank underneath and somewhat hidden.
Sketches done in class

Homework Monday March 27, 2023
For homework I asked my interview questions and collected the responses from Grant. When looking at his room, Grant doesn’t necessarily like to have everything organized and tucked away. While things sprawled all over the place works for him, he still has a problem with a power strip on his desk, which constantly falls over and takes up a lot of room. In my design Ii will try to make a custom compartment to hold his power strip and have slots for the cords to neatly come out. My answers and repeated questions are listed below:
- What items do you typically need to keep on your desktop, and what are their sizes and shapes?
- His notebook, power bank, books, lamp, and phone
- What is the overall style or aesthetic that you prefer for your desktop organizer?
- Wants a chess theme to match his room
- How much storage space do you need, and what types of compartments or drawers would you like to have?
- Wants storage for books and his power bank. I will try to add in a groove to hold a pen or pencil and slots for the cords to connect to the power bank, which will neatly hide in a hidden drawer with a cut out on the top for a grip.
- Where do you plan on placing the organizer on your desk and how much space do you have available?
- Plans on placing the organizer on the floor in between the desk and the dresser or on the corner of the desk if not possible.
- Do you want your organizer to be portable or stationary?
- Stationary
- Would you prefer a minimalist design with few embellishments or an ornate design with decorative elements?
- Prefers an ornate design with cut outs of a bishop and rook and a checkerboard on the back
- Do you need any particular features, such as a slot for a phone or tablet, or a space for a notepad or pen?
- A drawer on the side for the powerbank
- Would you prefer a stain to the wood, and if so, would you prefer a darker or lighter tone?
- Wants a darker stain on the wood
- Do you have any other preferences or ideas that you would like to see incorporated into your organizer?
- If paint is possible wants a black and blue checkerboard
Classwork Thursday March 23, 2023
Today in class we created lists for questions to ask our person when designing a desktop organizer. The person I am going to choose is a freshman Grant Askew, who respectfully needs a desktop organizer. Using chat GPT, I asked multiple questions and displayed the two best results below along with my compilation of 9 questions.
- what items do you typically need to keep on your desktop, and what are their sizes and shapes?
- What is the overall style or aesthetic that you prefer for your desktop organizer?
- How much storage space do you need, and what types of compartments or drawers would you like to have?
- Where do you plan on placing the organizer on your desk and how much space do you have available?
- Do you want your organizer to be portable or stationary?
- Would you prefer a minimalist design with few embellishments or an ornate design with decorative elements?
- Do you need any particular features, such as a slot for a phone or tablet, or a space for a notepad or pen?
- Would you prefer a stain to the wood, and if so, would you prefer a darker or lighter tone?
- Do you have any other preferences or ideas that you would like to see incorporated into you organizer?


Final Design

Pillars, Bottom and Divider

Middle Pillar

Classwork 2/15/2023
In class I finished the model of the basic pencil box. Along the way, I encountered some challenges when applying the joints in fusion, realizing that my pieces were incorrectly spaced to fit into each other.

Homework Due 2/16/2023
Today I created the design for my project on paper, the theme being of a castle. In fusion, I created a singular side containing the window.

Homework Due 2/15/2023
For homework, I completed the rest of the second and the third piece in the 3d model. I made sure that the variables in my model work correctly so that we can easily transfer the material from cardboard to wood. To create these pieces, a made a rectangle in the sketch and added a line the distance of the material thickness on either side longways. This allowed me to evenly divide the rectangles into 7 pieces and extrude every other piece, forming the two side pieces. The bottom was similar except there were only 3 pieces.

Homework 1/31/2023 This is my final design
For homework I completed the design of the base, which should support the the phone holder at a hinge. The phone holder can rotate to adjust the angle and the phone itself can also rotate in the holder. To complete the base, I simply extruded a rectangle that was at a 45 degree angle from the beam coming from the hinge. To adjust the angle, you can pull on the base instead of the phone holder, which is locked in place.

Completed phone design by 1/26/2023

Finished Lamp CAD by 1/26/2023
I finished the lamp CAD today by adding in the four different hardware items.

Homework 1/26/2023
For homework I created, extruded, and chamfered the two prongs that would lock in my design. During class, I created a rotating joint, locking both of my parts together and allowing the middle portion holding onto the iPhone to rotate. In my homework, I made the prongs both rotate as well, allowing for the person to lift both prongs and rotate the middle before dropping both prongs down to lock in the middle.

Homework 1/25/2023
For homework I created the rotating part that will hold the phone. The circle with cutouts will allow the person to rotate the phone to the correct orientation before moving a notch, which I haven’t created yet, to lock the mechanism. So far I have created the part that will house the phone and the ring around it that will hold the bendable notches.

Classwork 1/23/2023
Today in class I created different sketches of possible designs for my iPhone stand. The one I chose is supposed to rotate in the area that holds the phone and have a stand that can adjust depending on which notch the stand is inserted into.


Homework Due 1//12/2023
Today I created the bottom holes using the loft command and creating two different sized ovals on either side. I also created a plane running down the middle of the 3d model and used the mirror function to mirror one of my holes across to the other side. This saved a lot of time and made the model more accurate.

Homework Due 1/11/2023
For homework, I decided to model my case first before inserting the phone. I first started with a 2 point rectangle and then rounded the corners with the fillet tool at .3. After adding the shape, I cut out the slot where the phone would slide into with the extrude command. Afterward, I added the volume and power buttons by creating a 2 point rectangle and adding circles of .125 on either side.

Homework Due 12/14/2022
For homework, I created the horizontal lower arm by creating a a rectangle at the appropriate angle using lines. I then added the lower horizontal in the correct position using a construction line as a reference. I also used the combine tool to have the lower horizontal fit into the holes perfectly.

Homework Due 12/9/2022, Homework Due 12/9/2022
For homework, I created the lower arm and the two discs, large and small. To create the lower arm, I used two circles of different sizes and drew to lines across, similar to the upper arm. I then created the holes for the magnets and the horizontal piece to slide into. For the large and small disc I created a large circle and a small circle in the center to make the hole.

Classwork Due 12/7/2022, Homework Due 12/8/22
In class, we added the horizontal beam running in-between the two side parts of the arm. Using a combine function, we made the horizontal beam fit inside of the 6 holes on either side perfectly. Allowing the exportation to the laser cutter, we projected individual parts of the model and saved them as a dxf file.

Classwork Due 12/5/22, Homework Due 12/7/22
In class, we added to the design by adding the square wholes using a point of reference and copying the square created 6 times. We then copied the side profile and added a joint in the middle of the two sides to accurately space them apart.

Homework Due 12/5/22
Watching the video assigned, I drew the upper arm side profile using the circular sketch tool to form two different sized circles. I then used the line tool and tangent tool to create the bridge between the two circles before removing the leftover part of the circles with the snip tool.
Mon, Dec 5 HomeworkMon, Dec 5 ClassworkWed, Dec 7 Homework- Wed, Dec 7 Classwork
- Thurs, Dec 8 Classwork